mail me

Workaround for Godot's lack of support for importing camera focal length keyframes in glTF files

Author: Christoffer Blomvik
Material: Article
Published: 20.08.23
Keywords: blender, godot, godot-engine, game dev, gltf, gltf 2.0, animation, focal length, camera
View table of contents

Abstract

glTF allows for exporting scenes with ease between different 3D software. However, Godot currently does not import the keyframes for the Focal Length from Blender. This current limitation may prevent the use of animated camera tracks within Blender. This article will explain a workaround by making use of drivers within Blender to store the Focal Length of the camera on a scene object, which in return can be imported in Godot and set the FOV of scene camera per frame.

The issue

While the glTF format does store the focal length within the file, this is not imported as keyframes in Godot. It will only import the transform parameters of the camera.

A less ideal but working solution

While we can't import the keyframes of the camera's focal length, it is possible to easily translate the parameters of one object over to another, using what Blender calls 'drivers'. For instance, we could write the focal length parameter of the camera to an objects transform position.

This is of course not super ideal, as we would need to check the position of the object each frame, -- it is still a decent work around as during cinematic sequences there will be less activity happening in the game anyway.

Drivers

Drivers are a way to control values of properties by means of a function, or a mathematical expression.

As an example, the rotation of Object 1 can be controlled by the scale of Object 2. It is then said that the scale of Object 2 drives the rotation of Object 1.

Not only can drivers directly set the value of a property to the value of a different one, they can also combine multiple values using a fixed function or a Python expression and further modulate it with a manually defined curve and/or a modifier stack.

You can read more about driver in the offical documentation page.

Using drivers

First, we need an object of a type which can be imported into Godot with the glTF importer.

Create an object, such as a default Cube, so we can see it in the viewport when it is driven. However, this may also be an invisble object, like an empty. Lets position it somewhere on the Z axis where it is somewhere which can't be seen during the cinematic sequence.
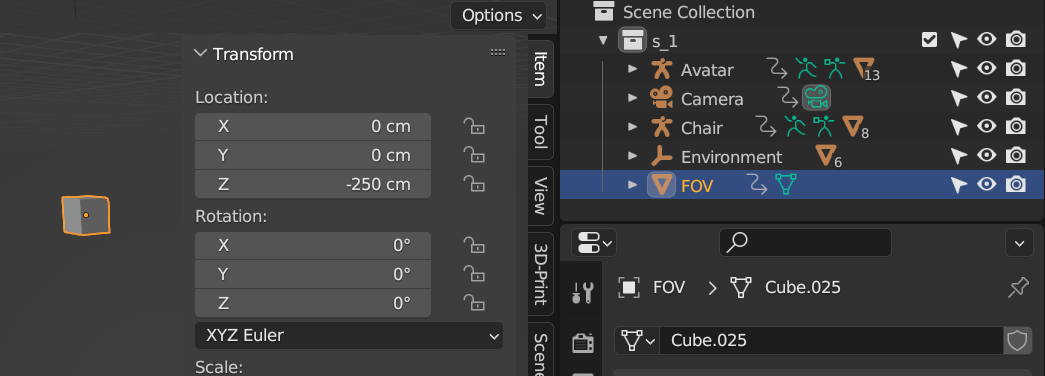
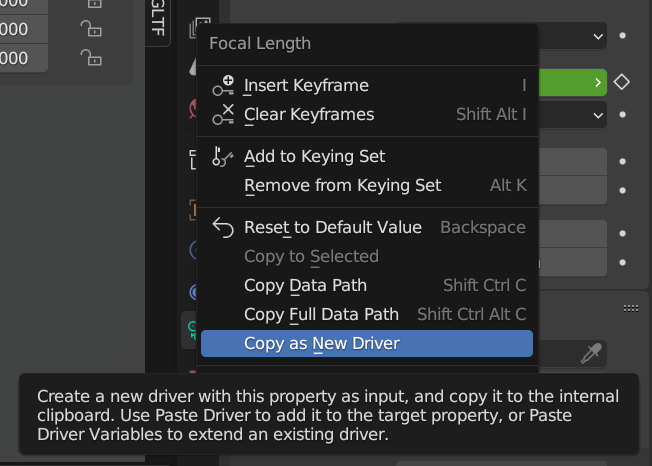
Next, we need to copy a new driver from the scene camera's focal length parameter.

Simply select the scene camera, go to the camera's Data tab where you find the Focal Length, and right click the parameter and select Copy as New Driver.
Now paste the driver onto a transform channel of the object that is to be driven, which in this case if the Cube that was made. This will result in the position of the cube to be the same value as the camera's focal length. In this case, 35mm focal length becomes 3500 in the X-axis.

If you don't like the extreme values, for instance due to fear of floating point errors, then you can make a custom expression by right clicking the transform channel where you pasted the driver and selecting Edit Driver. Here, you may change the type to Scripted Expression and write your own mathematical expression, for instance by dividing it by 10.
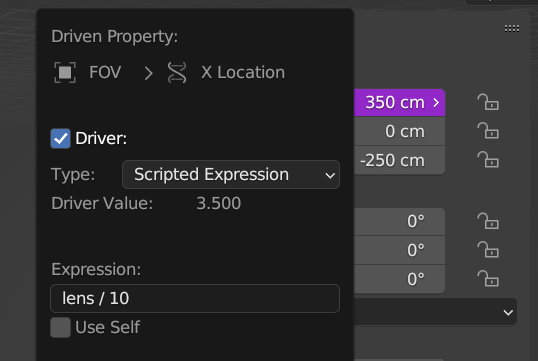
If you do so, then that must be accounted for in the Godot script below to get the right FOV during the sequence in Godot.

Now, we just need to export it.

Make your own scene-wide gltf exporter

I've written another article on how to create your own one-button glTF exporter in Blender called Combining animation tracks and strips into a single animation strip for scene-wide animation GLTF export

Godot settings

Depending on what format and what you are exporting between different files, the import settings may vary.

But the mean thing is to attach the following onto the godot scene object which contains the following:

  • The camera that was exported in Blender
  • The Focal Length driven object that has the focal length of the camera as a transform parameter. In this example, it was the cube that we named FOV.

In other words, the camera and the object driven by the focal length parameter must be in the same glTF file.

If that's not doable for your setup, then you'll need to change the path of the commented lines in the script below.

While running the function each frame is not ideal, the function is fast and if it is only used during cinematics then other per-frame functions of other game objects may be turned off to compensate.

About the script

A couple of things to look out for when using this script.

Firstly, on line 1 it says it extends a Node3D node. If you are using another type of node, then change the "Node3D" part to be the type of node your are using, or right click the node in the scene hierachy and select Change Type, and select Node3d.

Secondly, the paths for the camera and fov_reference_object must be correct. If you are unfamiliare with type node paths in Godot, your can have a look in the official documentation.

Other than that, I've added some comments in the script below for what's relative.

The script code